
Preset and Conversion Profiles Configurations EnterMediad 9.x
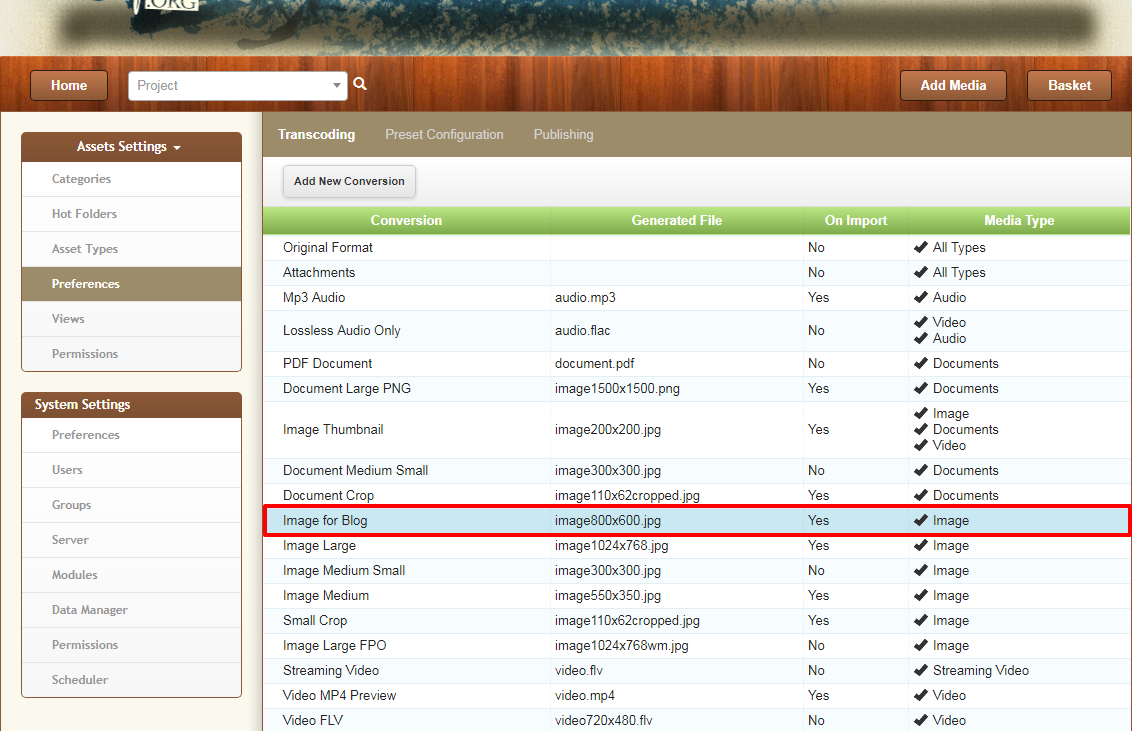
Within EnterMedia 9.x you can define the conversion profiles you want to have in your DAM for every asset type. You need to create a new Transcoding Conversion to fit your needs, it is always recommendable to create your custom transcodings and NOT changing built-in transcoding which Emshare is shipped with (Learn Why?). To create a New Transcoding Conversion we recommend starting by creating a new Preset Configuration which you will be using in your Transcoding. Go to Settings | Preferences and click on Add New Configuration. 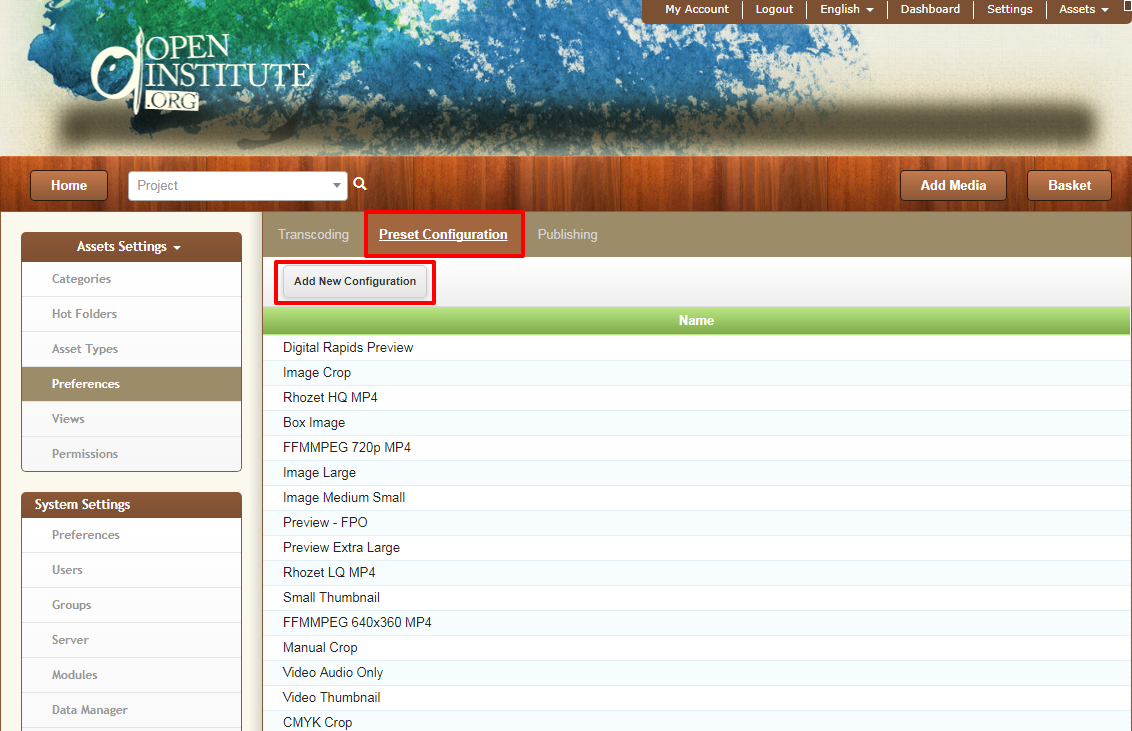 Let´s say you want to create a Preset Conversion for an 800x600px Image sized:
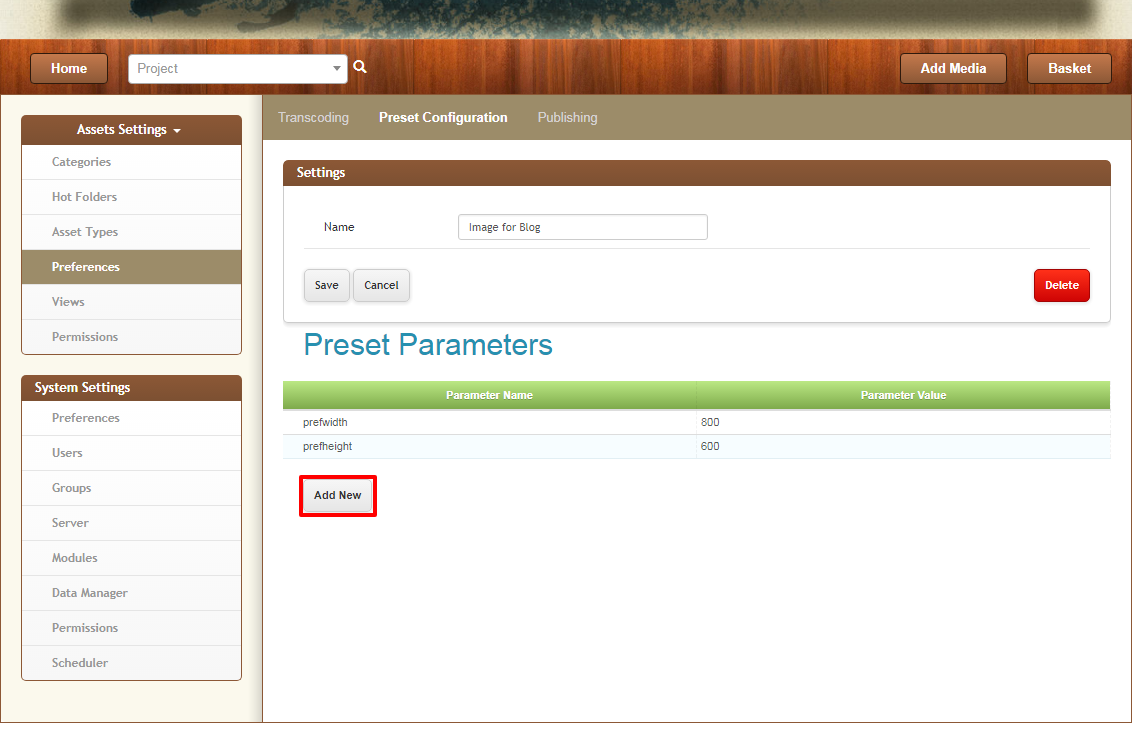
 You can create a Transcoding Conversion as follows:
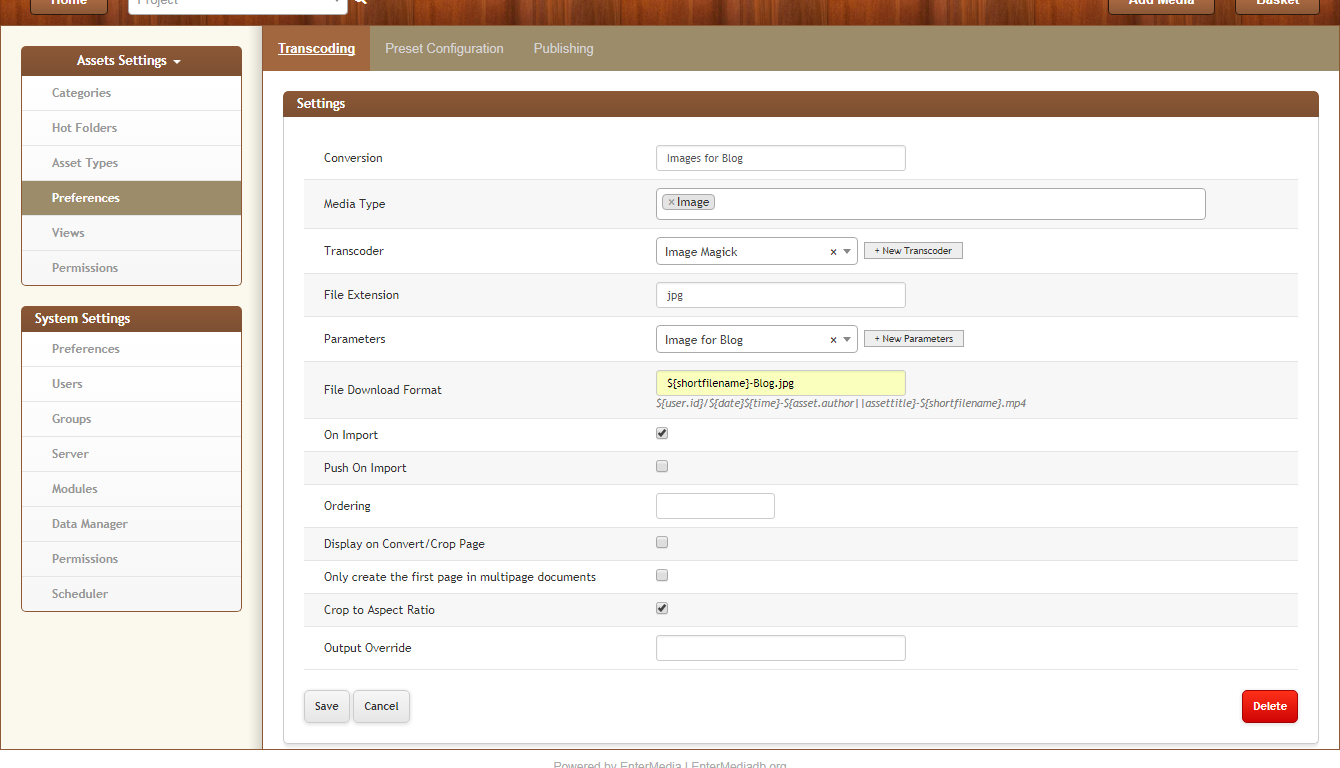
 Every time you change a parameter value you need to save the Transcoding Conversion in order to make it read the new preset data. Learn How to create an Auto-Cropping Conversion Image.
Preset Configuration
Let´s say you want to create a Preset Conversion for an 800x600px Image sized: - Select a Preset Name and click save
- Then, click on Add New to add new parameters to the Preset. You can find a list of Preset Parameters for Images here and a list of Preset Parameters for Videos here.
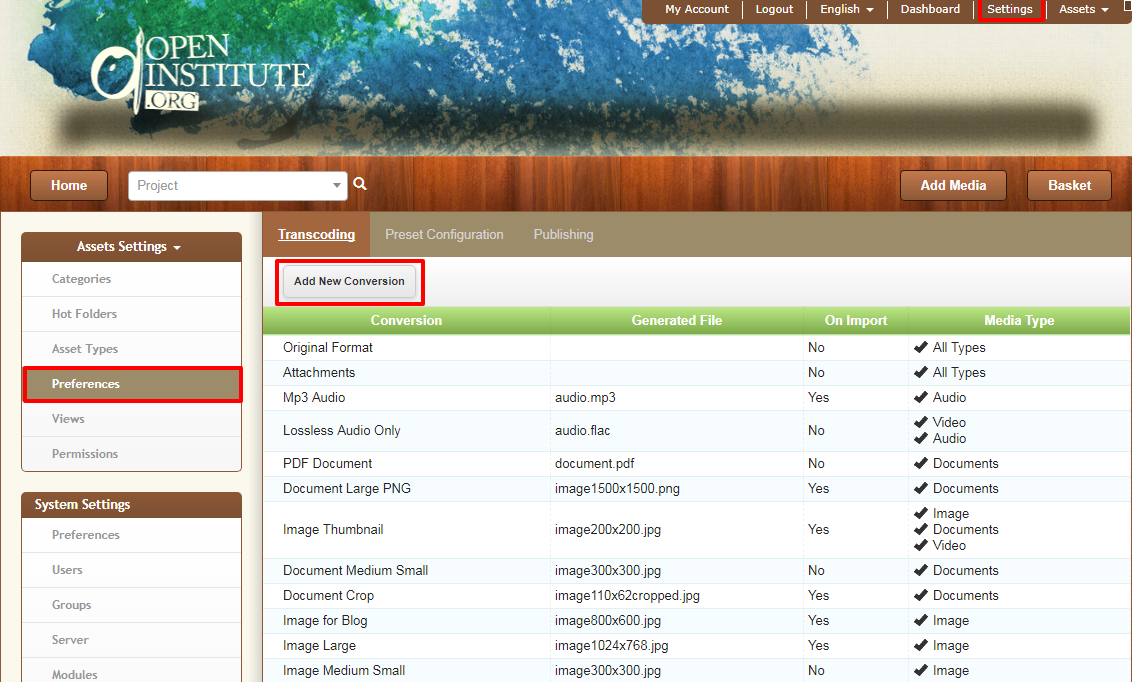
Transcoding Conversion
Once you have your Preset Configuration Ready, you can create the Transcoding Conversion. Go to Settings | Preferences and click on Add New Conversion. You can create a Transcoding Conversion as follows: - Define a Conversion Name.
- Media type
- Transcoder. Use ImageMagick for images, FFMPEG for videos and audio or Libre Office for documents.
- Download Format. Use a unique file download format for each Transcoder, you can use the suggest variables for the field.
- On Import. Turn on this option if you want to generate this Conversion when file is imported to the Dam.
- Display on Convert-Crop page. Will show the Conversion in the asset page.
- Crop to Aspect Ratio.
Every time you change a parameter value you need to save the Transcoding Conversion in order to make it read the new preset data. Learn How to create an Auto-Cropping Conversion Image.