
Module Setup and Data Relationships
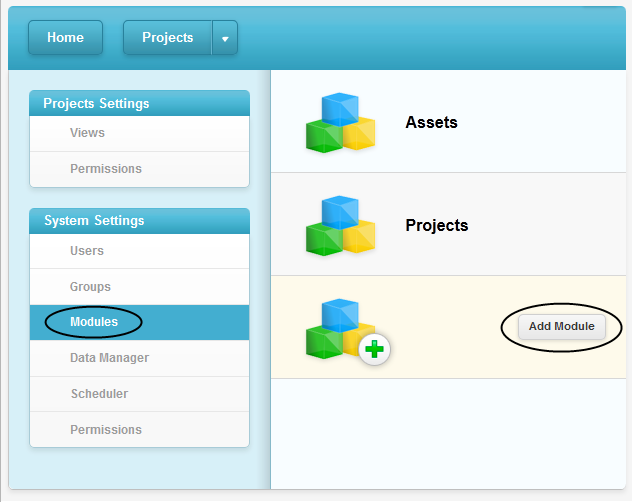
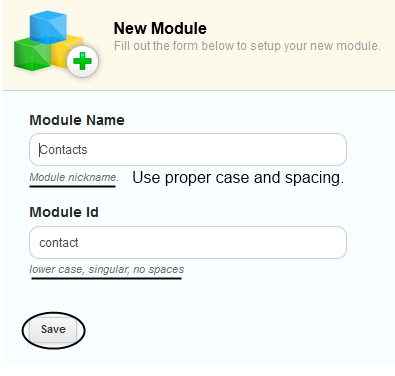
Modules are EnterMedia's way of saying yes to multiple databases. Modules can be used to create or import database tables for use within the DAM. When multiple modules are being utilized to better organize assets and information, it is sometimes useful to have relationships between entries. This capability can allow the user to make a seamless transition from one database to another following a trail of special metadata. EnterMedia ships with two default modules: Assets and Projects. These two have a predefined relationship that can be left alone or improved upon. If a site admin elects to create an additional module, new relationships can be established to connect the new area to its existing counterparts. This piece of documentation will assist administrators in teaching old data new tricks. To get started a new module will need to be set up. Go to Settings | Modules | Add Module. Choose a label and an id for the module. This is how users and administrators will identify the database when doing work or making changes. Make sure to use proper case and spacing with the module name and avoid both case and spacing in the module ID. 
 In this case a 'Contacts' module has been established. It can be used as an internal employee directory, a collections of vendors or contractors; or any other list of people that its creator wishes to document. Once the module has been established the fields and views will need to be added. The 'contact' table can be accessed through the data manager. Fields can be added in this area. They can also be added while setting up a custom view by selecting the new module from the drop down, returning to settings, choosing views from the side navigation bar. Multiple views can be set up in this area. The default views for table results and advanced searching options are available in the 'System' tab. The users can customize their own views if they have permissions, but this will give them a basic list to start with and revert to if necessary. The 'Editing' tab is for setting up data views where metadata can be viewed. Each data view can be protected by permissions, which is outlined in another piece of documentation. This way users will only see what administrators intend for them to see.
 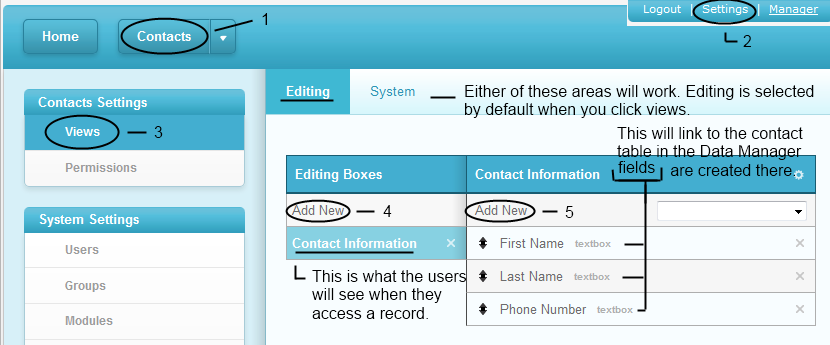 New views and fields can be added at any time. The most important part is knowing how to make additions/ adjustments when needed. Take some time to experiment and learn the tools so that managing the user experience will be second nature. In some cases, it may be appropriate to link users from one module to another. For example, a content manager may want to create a field called 'Primary Contact' that can be assigned to a project or an individual asset. This field can be used as a link to send the user to the Contacts module where a full profile of the vendor/ contractor/ employee is available for review. Likewise the profile of a vendor/ contractor/ employee may have links to projects or assets that they are related to in some way. To establish a relationship field between modules, an administrator must first create a field. In this example 'Primary Contact' will be added to the project table so users can be linked to the Contacts module. Once the field is created change the data type to 'List'. Change the render type to 'Auto Complete Keywords'. Make the list ID the same as the module ID. Remember that it should be lowercase and singular with no spaces. Save the changes. Reindex.
 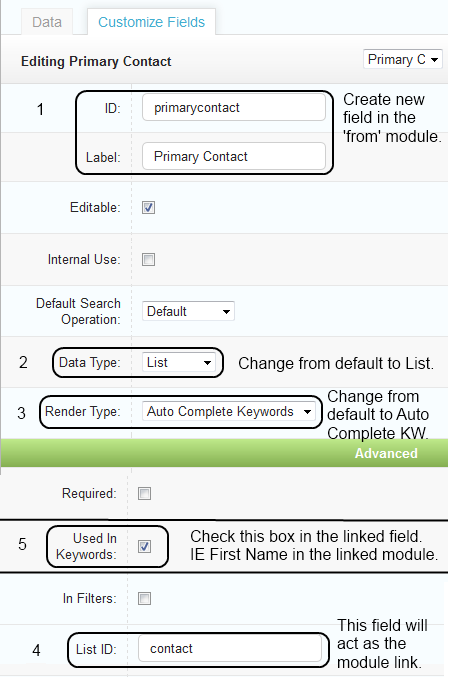 Next, navigate to the corresponding module and check the 'Used in Keywords' box in the advanced options area for the field(s) that should be searchable. For this example, 'First Name' or 'Last Name' would be appropriate. Save the changes. Reindex. One final and very important detail is that there must be a single field designated as a label. This label is a system default and should always be used. The label is the 'name' field. The 'name' field is not to be confused with the 'First Name' or 'Last Name' fields that were used in the previous example. Continuing with that example, 'First Name' could be 'John', 'Last Name' could be 'Smith' and 'name' could be 'John Smith'. This labeling would ensure that although both first and last name were searchable as keywords, the full 'name' field would be used for display and linking purposes. Now that the field has been created and a relationship established, the field should be added to a data view. Once in the data view the field will auto complete based on the fields from the corresponding table that were marked as 'Used in Keywords'. Note that multiple fields can be linked to a single field.
 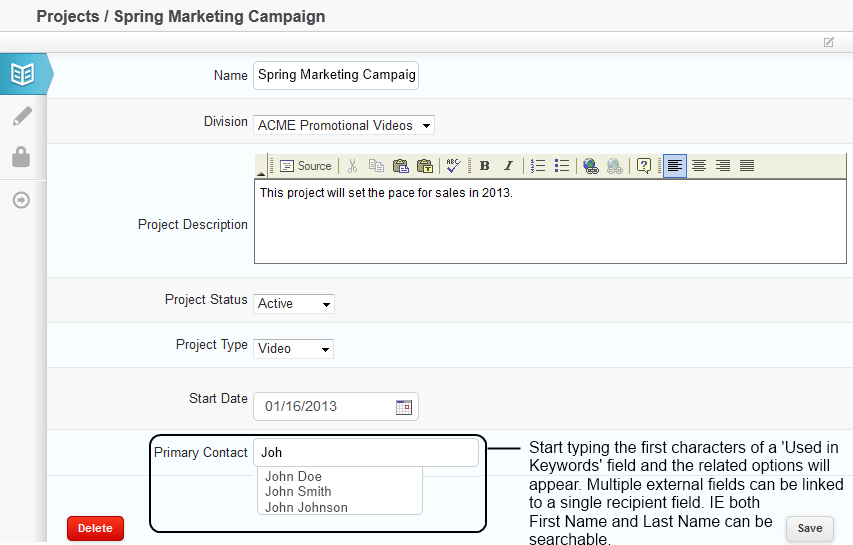 After a single item has been selected, a 'View' button will appear which will act as the link to the corresponding module.