
Moodle LMS Integration with LTI
- Add a new ltiautologinkey row as follows (replace the value with your key's value):
 2. Open your Moodle installation and select:
 - Site Administration/Plugins/Activity Modules
- Click on Manage Activities/LTI Administration
- Click on “External Tool Configuration”
- Click “Add External Tool Configuration”
 4. Create a Tool name (This is what will show when instructors are adding the tool to their classroom). 5. Add the Base URL, Consumer Key and Shared Secret. Leave the Custom Parameters box empty.
 - Base URL: https://yoursitename.entermediadb.net/yourcatalog/index.html
- Consumer Key: entermediadbkey (for example).
- Shared Secret: this will be a long encrypted key that Entermedia will create for you.

9. Scroll all the way to the bottom and select “Save Changes”.
Your Tool installation is complete.
Adding an instance of the tool to a classroom
At this point you are going to need access to the Entermediadb instance for your institution.
1. Login to Entermedia and locate the media that you want to imbed in your classroom.
2. Click the “Share” option and then select “Embed”.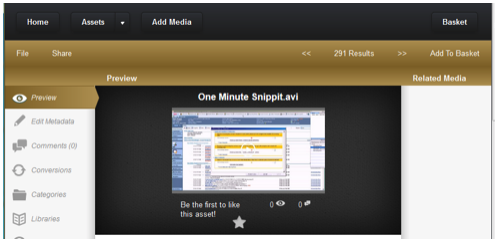 3. From the “Embed” window select the “Preview Page” option, making sure you have selected the entire URL.
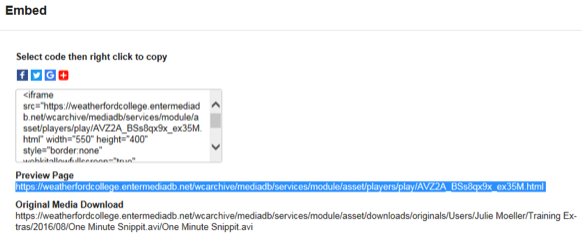
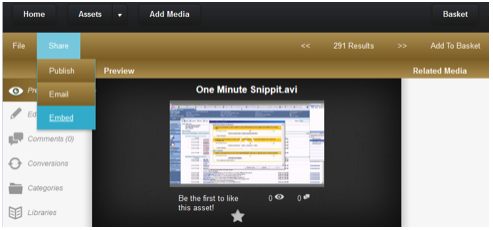
4. From the “Embed” window select the “Preview Page” option, making sure you have selected the entire URL.
5. Go back to Moodle and locate the classroom that you want to place the link into.
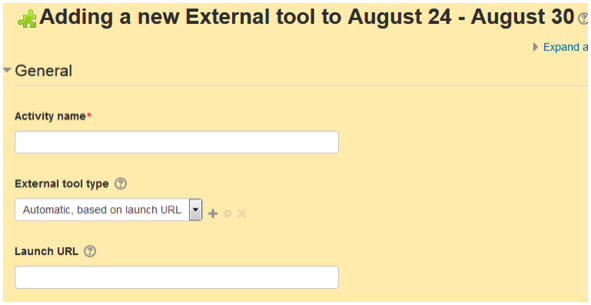
6. Turn Editing on and scroll to the section where the link will reside and select “Add an Activity”, then select “External Tool”.
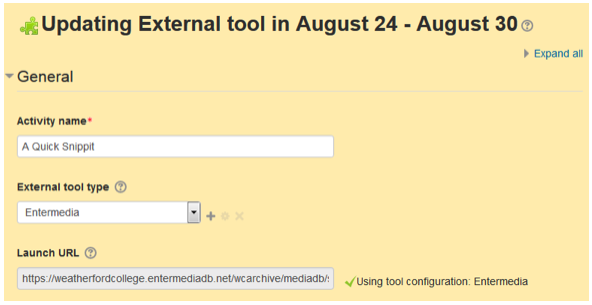
7. When the External Tool window pops up you will have the opportunity to add a title for the activity.
8. Add your Activity Name, and then paste your URL into the “Launch URL” field.
9. Scroll all the way to the bottom and save.
10. Select “Edit/Edit Settings for the tool you just added (we’re going to link it to the Entermedia LTI now).
11. In the “External Tool Type” drop down, select “Entermedia” as the tool type. You should now see a green checkmark next to your Launch URL that says “Using Tool Configuration: Entermedia”.
12. Scroll down and SAVE.
Your tool is now successfully embedded in your classroom.