
Badges on Assets
Now on EnterMediaDb 9 you can add visible indicators on asset status such as: Duplicate | Pending | Approve | Rejected 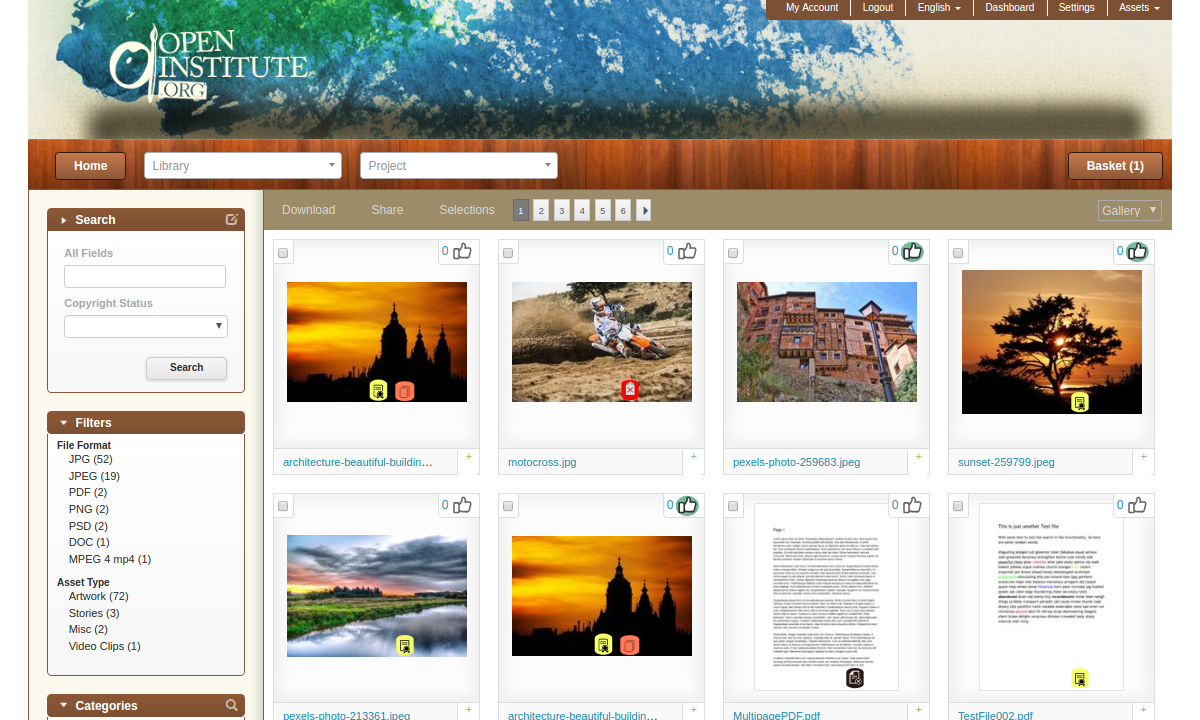
 2) Add a new value to the field, this value will control when the badge is shown. E.g. For the "Edit Status" field, you can add a new status, add processed as Id and Processed as Name.
 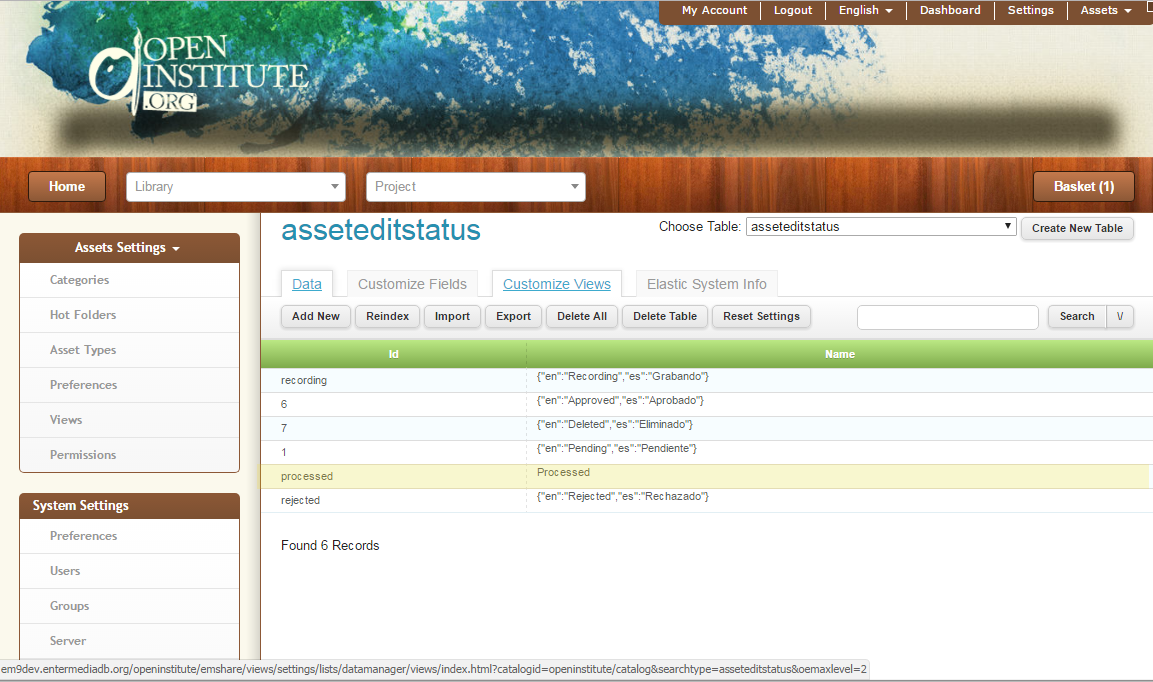 3) Add badge to database table: Settings > System Settings > Data Manager > Select the badge table and add a new row, following name convention as follow for the id:
 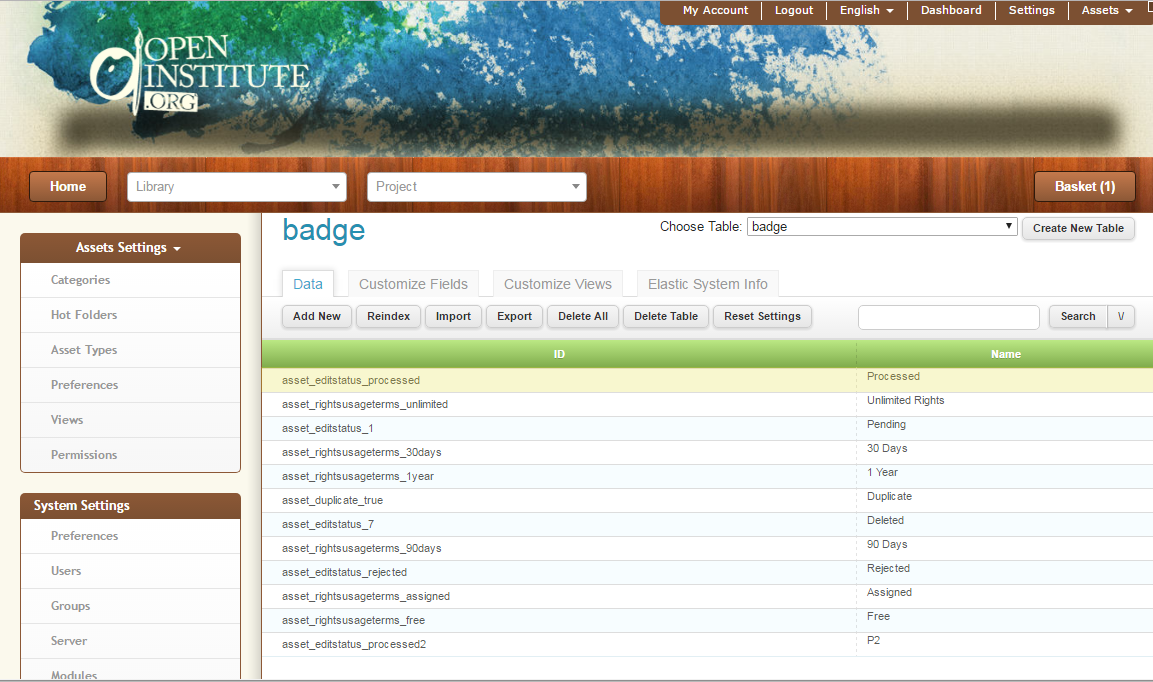 4) Upload a SVG icon file with the same name you used in the previows step in the badges path of your application, the standard path for default "assets" application is:
Enable Badges
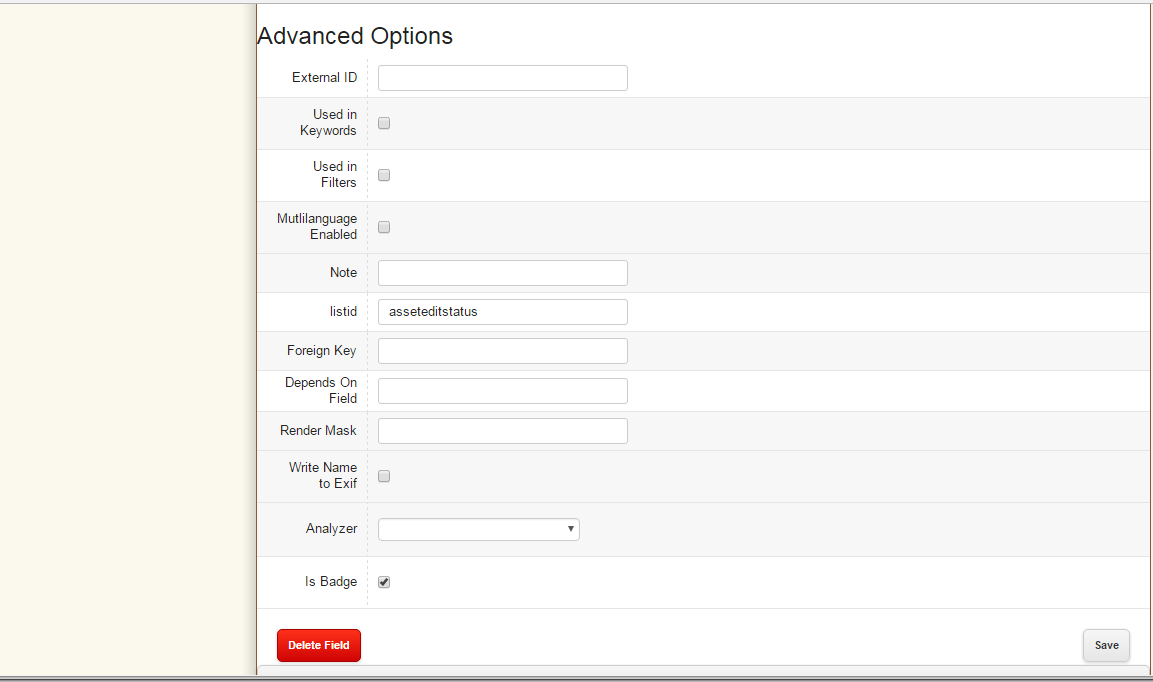
To enable Badges feature overall your EnterMedia application you must check the related permission. By default administrators and users can see badges once the feature is enabled. To turn on or turn off badges you need to go to Settings > Permissions > Show Badge. EnterMedia installation includes basic badges for common asset's edit status field. You can add your own badges on any list field in your database. 1) Enable the badge feature on the specific field you want to control the badge in the asset table. Go to: Settings > System Settings > Data Manager > Select asset table and select the Field. Scroll to the bottom and click on Advance Settings button and check the "Is Badge" box.tablename_fieldname_fieldvalueid E.g. Table: asset Field: editstatus Field value id: processedAdd to the badge table a row with the id:
asset_editstatus_processed webapp/assets/emshare/theme/images/badges. Create the final path if is not there. E.g. webapp/assets/emshare/theme/images/badges/asset_editstatus_processed.svgFirst time you enable Badges you will need to restart the server and your browser cache to be able to see your custom badge over the assets with the defined value.