Preset and Conversion Profiles Configurations
Creating a new preset with a given height and width can be done in the asset preferences area. This area is also used for setting up transcoding/conversion profiles.
To create a new conversion with a distinguished label and predefined width and height, the following steps should be taken:
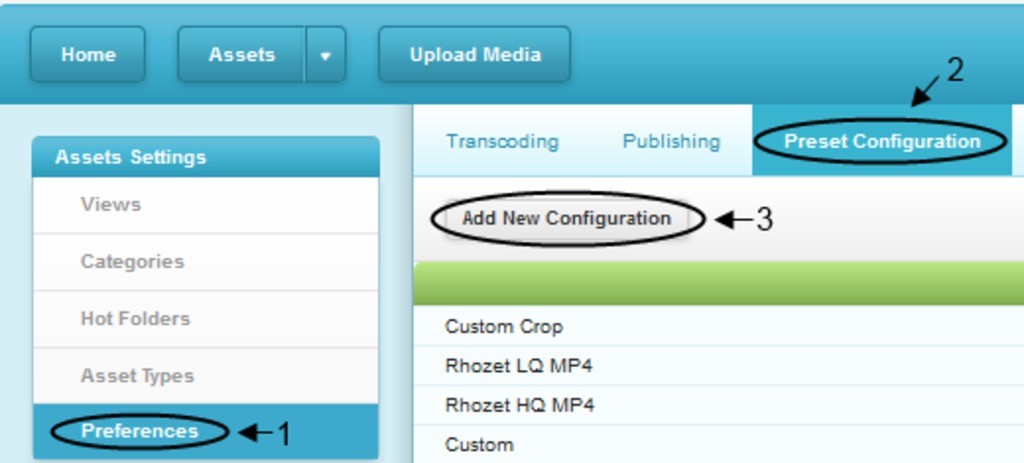
Preset Configuration Display
1. Click
Add New Configuration. Preset configurations capture information that is passed to the conversion utilities such as whether the image should be watermarked, prefered height and width, etc. 2. Once the configuration has been added, set the following values:
| Name | Value |
| prefwidth | eg: 1024 |
| prefheight | eg: 768 |
| extentwidth | eg: 1024 |
| extentheight | eg: 768 |
| extent | eg: true |
| minsize | eg: true |
| crop | true/false (whether we should crop to this size or resize to fit while maintaining aspect ratio) |
You can review the following
documentation to know what are the supported preset parameters. These configurations can be re-used across multiple conversions as desired. Once all conversions have been specified, you need to create a Transcoding profile that applies the new profile. You can access the profiles from the Asset Settings | Preferences | Transcoding section of the administrative tools. The following screenshot should serve as a guide for setting up the new profile:
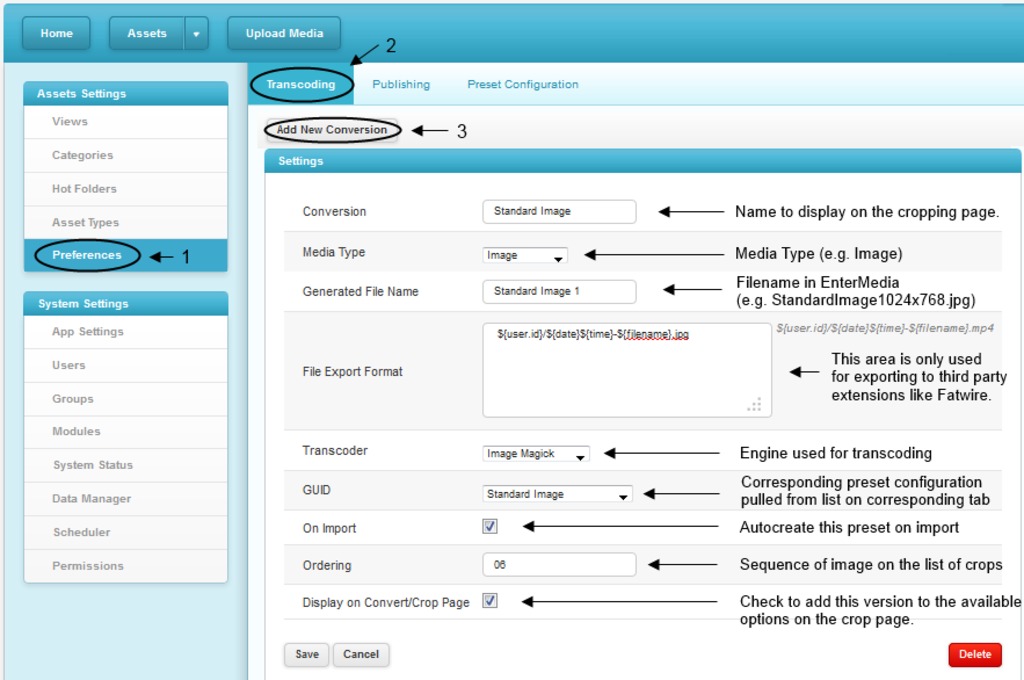
For the 'File Export Format', a variety of variables are available. Any metadata associated with an asset can be used. In addition, the symbols “||” can be used within a given field to provide alternative options if a value is not set. For example: ${asset.assettitle||filename}1024_${asset.id}.jpg The above example generates an export file name consisting of the asset id prefixed by the asset title. If, however, the asset title is not available, the filename will be used in its place.