Defining Roles and Custom Permissions

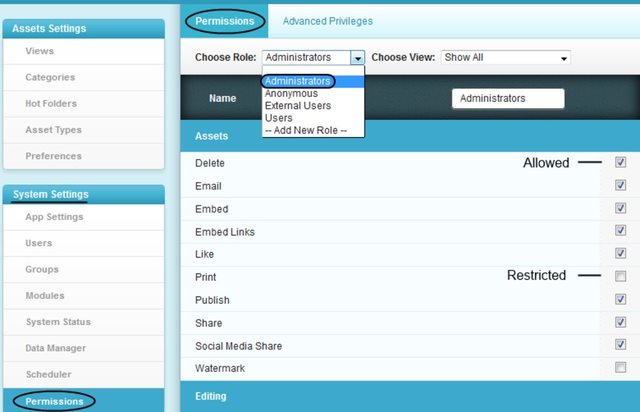
Roles and users have a one to one ratio within a single catalog. A user can have a different role in another catalog. Each catalog can have an unlimited number of roles. In order to increase the options of an individual user they should be moved to a more permissive role, rather than making changes to the role itself. Individual roles can be tweaked, but be aware that changes to a role will apply to all users.
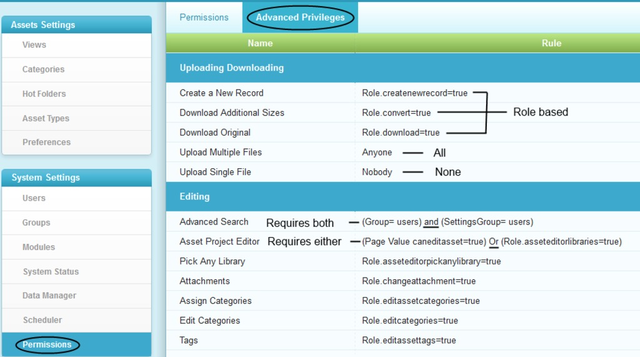
Permission customizations and application overrides can be established in the Settings | (System Settings) Permissions | Advanced Privileges (tab) area. Here the terms of each permission are determined on a per application basis. 'Role.featureid=true' means that the application will refer to a role when determining whether a user can use a feature. Each permission can be set up to refer to groups or individual users as well. AND / OR logic is also available to create more complex access requirements. IE a user may be required to be a member of both a role or a group in order to access secure metadata, or a user may need to belong to a certain role or an internal group in order to access a second application.
In some cases, an administrator may want to create a custom permission. A common example of this is adding a private metadata view to the asset metadata viewing area. The General and File Properties ship by default and are public to all users. This can also be changed by creating a custom permission.
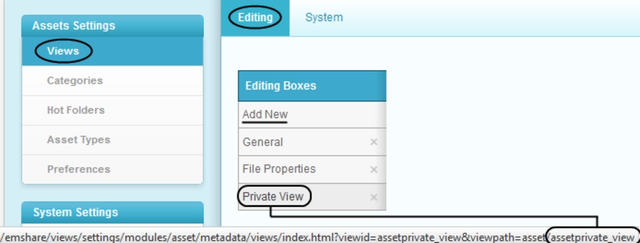
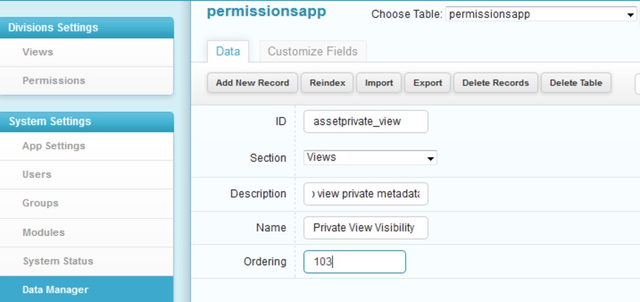
For an example, create an additional view called 'Private View' in the Settings | Views | Editing (tab) by clicking 'Add New' under editing boxes. By default the system will assign an internal to the field of 'assetprivate_view'. Confirm the ID by hovering over the new view and reading the url at the bottom of the browser. When this is done proceed to the Data Manager and drop down to the permissionsapp (table). Click 'Add New Record' and fill in the appropriate information. Once all of the blanks are filled in the permission must be set in the Application Preferences area. By default the permission is turned off for all users.


