Git Hot Folders
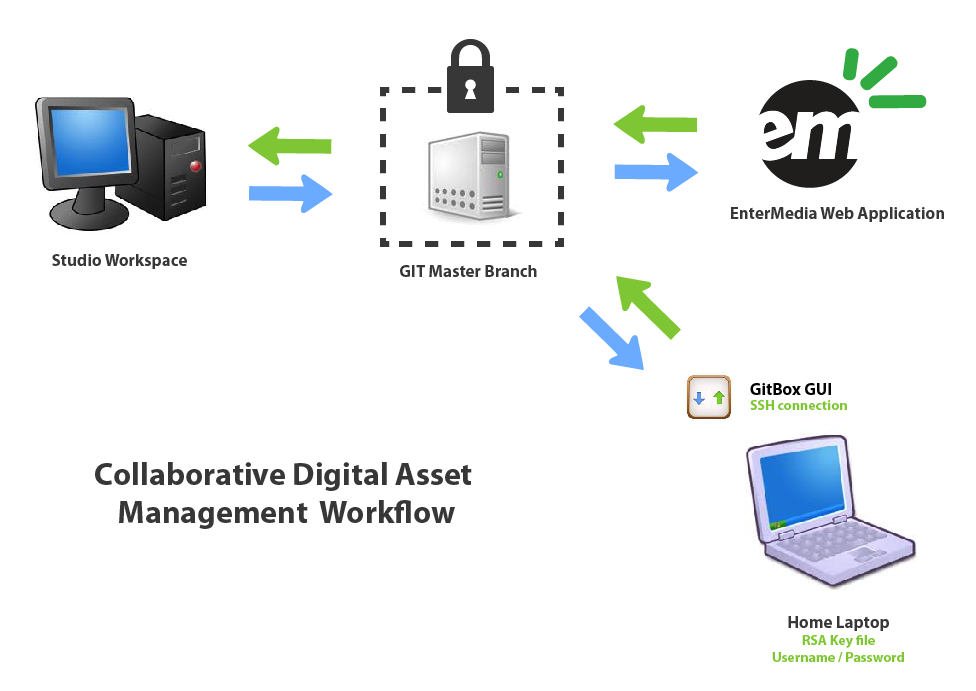 This document is designed to give a better understanding of the proposed GIT Workflow. The workflow can be broken down into steps, starting with the initial setup.
 Step 1: Downloading and Installing a graphical GIT client
Our recommended graphical GIT client is GitBox. It is recommended for several reasons but mainly we like it because it is simple and intuitive to use for non-GIT experts. GitBox is only available for Mac OSX users. - Download GitBox here: http://gitboxapp.com/
- Once downloaded, click on .zip file to unzip the application.
- Drag the application icon from your downloads location to your Applications folder, optionally you can drag GitBox to your dock.
- Open GitBox, it should look like this:
Step 2: Setting up your local repositories
- Click on the + and select Clone Repository...
- Enter the repository address in the prompt. (ssh://entermedia@openinstitute.org/vol/git/120821-2A.git)
- At this stage you will be prompted for a password (Ask Us).
- Choose a location on your hard drive to store the cloned files.
- The files will download from the server via SSH.
- Once the files are finished downloading, right click the repository folder in the sidebar and click Open in Finder to view the files on your hard drive.
Step 3: Working with your files
- From this location on your hard drive you can open and manipulate the files as you normally would. Once you are finished working on the files, you are ready to view and commit your changes. In the case of the screenshot below I added 3 new files and folder called New Files.
- Clicking on the top line of the middle column in GitBox will show the details of your changes in the Right column.
- This view allow you to check your changes and make sure that all of them are correct and accounted for, add a note in the Commit box and hit the button labeled Commit to ready your changes to be pushed to the server.
- Once your changes have been successfully committed you will see a new line appear underneath Working Directory clean that has a green dot next to it. This means that a commit is ready to be pushed to the server. Click the box with the green dot, and hit the Push button at the top of the application to push your changes to the server.
- The web site will be updated automatically after someone checks in new files.
EnterMediaDB - Open Source Digital Asset Management

 This document is designed to give a better understanding of the proposed GIT Workflow. The workflow can be broken down into steps, starting with the initial setup.