
Clone an EntermediaDB instance
Sometimes you might find the need to clone or move an EntermediaDB Docker instance to another local location or remote server. This article with lead you step by step to do exactly this while preserving your instance's functionality.
First, an outline of the process:
- Use RSYNC to transfer the bulk amount of data between the old and new location.
- Configure the new location, folders, and files for the EM instance and/or your webserver.
- Deploy the proper scripts to start the new instance. Depending on your situation an extra RSYNC might be needed beforehand.
1. RSYNC Bulk Transfer
RSYNC is our go-to tool to copy/move files in and between servers for its usabalilty, reliability, and ability to use SSH key-pair encrypted connections. Other options like scp or sftp are feasible as well but they do not provide hash verification between files. You can check our documentation for using sftp for data export that can be found here.
When running the initial script to install EntermediaDB on Docker, the path /media/emsites/ will be created to store your EM Instances and their respective data. Under this path you'll find the name of your instance (set when the instance was created), example: /media/emsites/test123.
The RYSNC algorithm that we use to move instances between servers over SSH (with a config file set) is:
# For Data rsync -aHXx --protect-args $SERVER:/media/emsites/$CLIENT/data /media/emsites/$CLIENT/data # For Elastic Snapshots rsync -aHXxz -- protect-args $SERVER:/media/emsites/$CLIENT/elastic/repos /media/emsites/$CLIENT/elastic/repos # For Everything Else rsync -azHAXx --protect-args --exclude={'data/*','*/tomcat/logs','*/tomcat/logs','*/tomcat/logs','elastic/*'} $SERVER:/media/emsites/$CLIENT/* /media/emsites/$CLIENT-b/ NOTE: Your specific case might vary, so please refer to the Rsync's manual page.
2. Configure The New Instance
NOTE: If you are creating a multi-instance sync service with EM10's built in bi-directional sync then it is absolutely necessary to reconfigure the secondary nodes for proper functionality. If you are just moving an EM Instance to a new location then this section can be skipped.
- Once the initial RSYNC has been completed we'll have to change the rebuild.sh, entermedia-docker.sh, node.xml, and rename 2 folders. These can be found under the /media/emsites/INSTANCE/NODE-NUMBER/ folder.
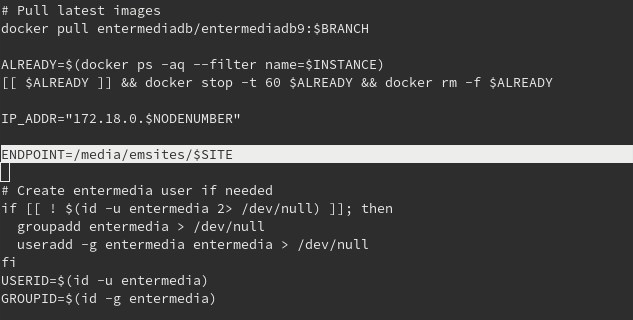
Let's start out with editing the rebuild.sh script by changing the instance name, node number, and possibly subnet. If this is an EM sync setup then only the instance name must be different if there are no conflicts with existing Docker containers.
# To edit to rebuild script. sudoedit /media/emsites/$INSTANCE/$NODE-NUMBER/rebuild.sh
# Inside the Script; edit the variables to suit your scenario. sudo bash /media/emsites/$INSTANCE/$NODE-NUMBER/rebuild.sh $INSTANCE $NODE-NUMBER $SUBNET
NOTE: DO NOT RUN THE SCRIPT YET.
OPTIONAL: If you'd like to change the installation location then we'll be editing the entermedia-docker.sh script and editing the following highlighted line, replacing it with the absolute file path to the new location while leaving the $SITE variable unmodified.
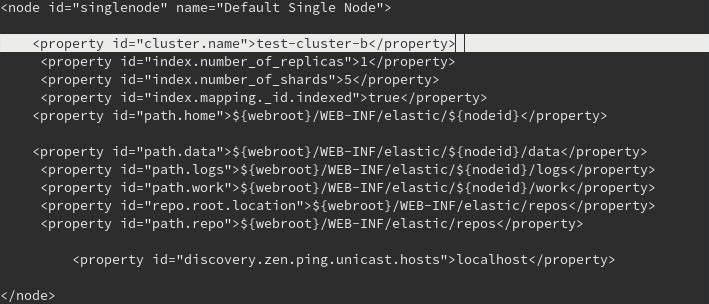
<property id="cluster.name">$test-cluster-b</property>
Now go up back to /media/emsites/INSTANCE/ and then go down into /elastic/. Rename the folder with your INSTANCE(NODE-NUMBER) using the mv command:
mv test10 test10-b
From here we'll be descending into this newly renamed folder and then one more time into the /data/ folder. Rename the only folder here (ex: INSTANCE-cluster) to reflect the same name we created in the previous node.xml edit. We can use the mv command again to proceed.
mv test-cluster test-cluster-b
3. Deploying Entermedia Docker Instance
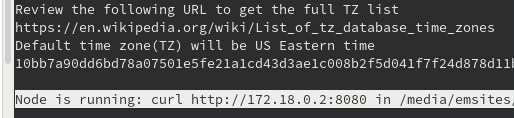
Change directory back to /media/emsites/INSTANCE/NODE-NUMBER/ directory and run the previously modified rebuild.sh script. Make note of the output, specifically the IP address the Docker instance is running on.
./rebuild.sh
Then, change directory to /etc/nginx/conf.d/ and copy the following configuration naming it to reflect the instance name we set earlier. We are assuming you are using NGINX for your webserver.
NOTE: You'll need sudo permissions to edit this file. We recommed using the command sudoedit.
sudoedit test-b.conf
Use the ESCAPE button the command :wq! to save and exit the file. Similar syntax and usage to the vi editor.
server { server_name test-b.entermediadb.net; # CHANGE THIS URL TO REFLECT YOUR OWN location / { proxy_max_temp_file_size 2048m; proxy_read_timeout 1200s; proxy_send_timeout 1200s; proxy_connect_timeout 1200s; client_max_body_size 100G; proxy_set_header Upgrade $http_upgrade; proxy_set_header Connection "upgrade"; proxy_set_header X-Forwarded-For $proxy_add_x_forwarded_for; proxy_set_header Host $http_host; proxy_pass http://test-b; # CHANGE THIS TO REFLECT YOUR OWN SITUATION } listen 443 ; # managed by Certbot ssl_certificate /etc/letsencrypt/live/entermediadb.net/fullchain.pem; # managed by Certbot ssl_certificate_key /etc/letsencrypt/live/entermediadb.net/privkey.pem; # managed by Certbot include /etc/letsencrypt/options-ssl-nginx.conf; # managed by Certbot ssl_dhparam /etc/letsencrypt/ssl-dhparams.pem; # managed by Certbot } upstream test-b { # CHANGE THIS TO REFLECT YOUR SITUATION ip_hash; server 172.18.0.2:8080; # CHANGE THIS TO THE PREVIOUSLY NOTED IP ADDRESS FOR THE DOCKER CONTAINER } server { listen 80; return 301 https://$host$request_uri; server_name test-b.entermediadb.net; # CHANGE THIS TO FIT YOUR SITUATION # return 404; # managed by Certbot NOTE: You can omit and remove the SSL section if you don't use or use another SSL provider.
Restart the NGINX service by using a soft reload that reads the new INSTANCE.conf file without interrupting other services being served by NGINX.
sudo nginx -s reload
Now we are ready to add the new DNS record to your domain host reflecting the new instance. Depending on your environment a CNAME record or an A record should be sufficient. NGINX will detect the domain address per the .conf file we previously configured.
The last part is to head over and log in to your new cloned instance (once the DNS record has propagated). Go to Settings, then Server and click on the Reindex button for EM10 to put all the pieces of the database back together automagically.
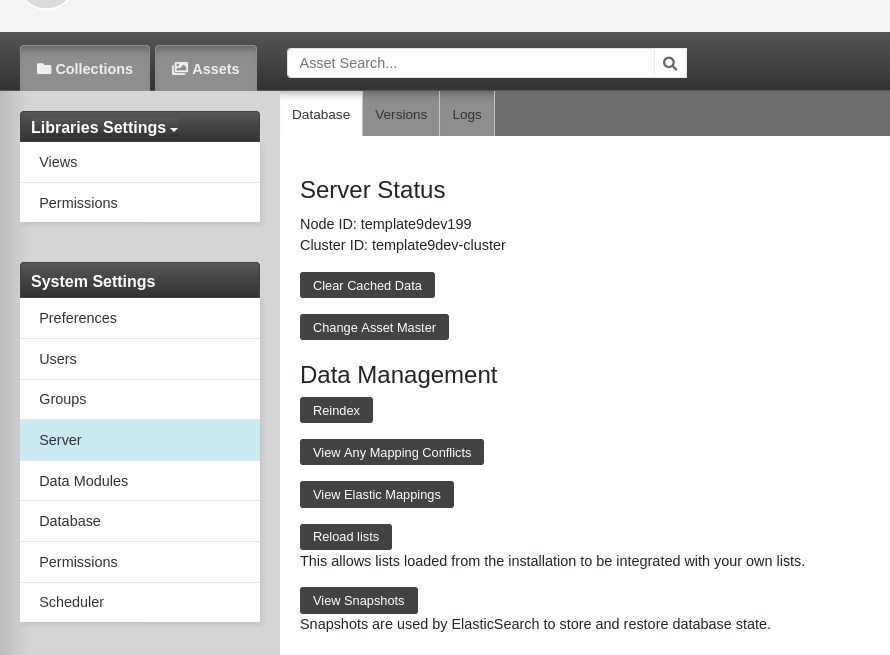
NOTE: Depending on your RSYNC process, you might need to restore a past snapshot if assets aren't showing!
Once this is done the new container is up and running on the internet!
3.1 RSYNC for EM SYNC
If we're configuring EM Sync after this, then stop both the origin and the sync instance we just created. This is to avoid corruption with the elastic search files during the final transfer.
We provide easy to use scripts to do exactly this under the /media/emsites/$INSTANCE/$NODE-NUMBER/ folder. It might be necessary to edit these scripts by replacing the old $INSTANCE name to the new name.
The original RSYNC must be ran with superuser permissions on the machine where the sync instance is located. Again we have configured our SSH config file for remoteserver.
sudo rsync remoteserver:/media/emsites/$INSTANCE/* /media/emsites/$INSTANCE/
Then start both containers using the same scripts in the same folder.
And we're done!